If you’re searching for a clear, competitive edge in your aim, this guide is built for you. Finding the right sensitivity can be the difference between snapping perfectly to a target and constantly overcorrecting under pressure. This article serves as a complete fps sensitivity settings guide, breaking down how sensitivity actually impacts tracking, flick shots, recoil control, and overall consistency in fast-paced shooters.
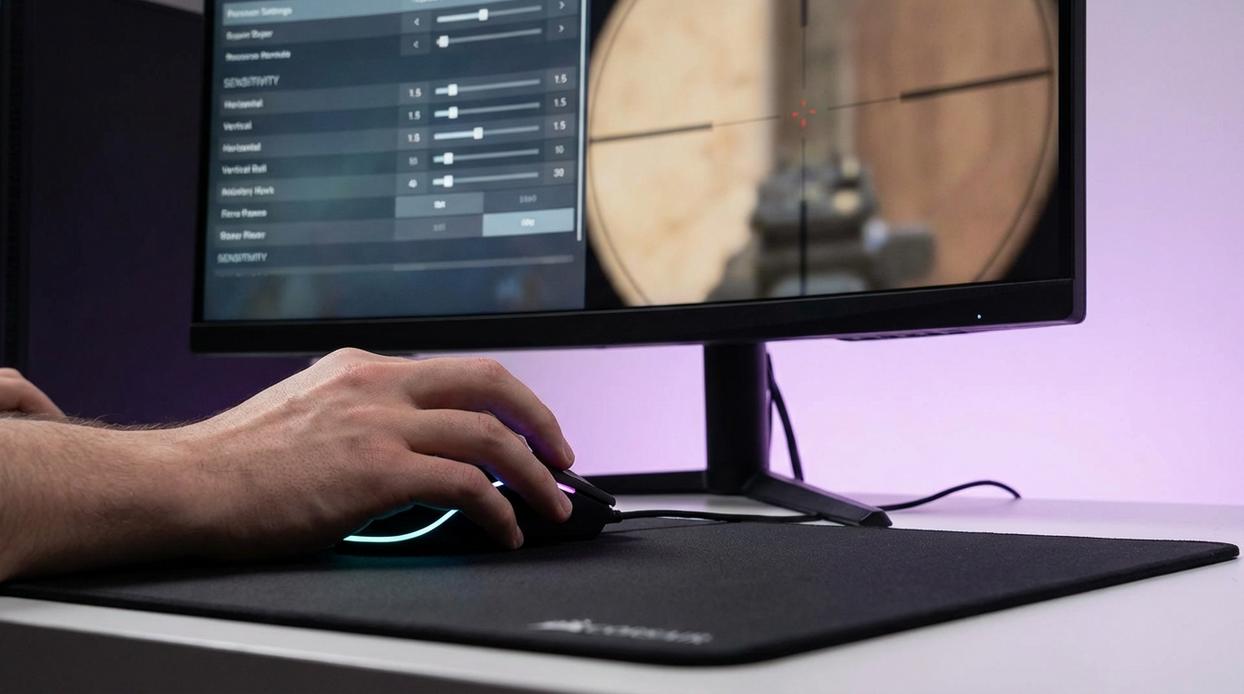
Many players copy pro settings without understanding why they work. Here, you’ll learn the core principles behind DPI, in-game sensitivity, eDPI, deadzones, and controller response curves—so you can fine-tune your setup based on your playstyle and the specific FPS you’re grinding.
Our recommendations are grounded in competitive gameplay analysis, pro-level controller configurations, and tested in real match scenarios—not just theory. Whether you’re preparing for ranked ladders, tournaments, or high-stakes scrims, this guide will help you build settings that feel natural, controlled, and tournament-ready.
Stop Guessing, Start Winning: A Pro’s Guide to Perfect FPS Aim
If your crosshair feels out of control, it’s probably NOT your mechanics—it’s your sensitivity. Most missed shots come from over-correcting (tiny panic swipes) or under-rotating during fast turns.
Start here: lower your sensitivity until a full mouse swipe equals a 180-degree turn. This builds consistency. Then test tracking and flick shots in a practice range for 10 minutes daily.
Some argue higher sens means faster reactions. True—but precision wins more duels long term.
Use this fps sensitivity settings guide approach:
- START LOW AND STABLE
- Adjust in small 5% increments
Consistency beats chaos. Always.
Why Your Sensitivity is the Most Important Setting You’ll Ever Change
Sensitivity is the FOUNDATION of muscle memory—the brain’s ability to store and repeat precise movements without conscious thought. Every flick shot and tracking duel depends on repetition. Change your sensitivity constantly, and you reset that progress (like reinstalling the game every week and wondering why you’re still rusty).
Many players argue high sensitivity is better because it’s faster. Others swear low sensitivity guarantees laser precision. The truth? It’s a trade-off:
- High sens = faster turns, quicker reactions
- Low sens = steadier crosshair, tighter micro-adjustments
Neither is universally “best.” The benefit comes from consistency. Stable settings directly impact headshot percentage, time-to-kill, and 1v1 survivability. Research on motor learning shows repetition under fixed conditions improves accuracy over time (Schmidt & Lee, 2011).
The REAL goal isn’t copying a pro—it’s finding your optimal range. Use a fps sensitivity settings guide once, lock it in, and TRAIN. Your reward? More confidence, cleaner fights, and measurable improvement where it counts.
The Building Blocks: Understanding DPI, In-Game Sens, and eDPI
First, let’s define the core terms. DPI (Dots Per Inch) is your mouse’s hardware sensitivity. In simple terms, it measures how far your cursor moves on screen for every inch you move your mouse physically. Higher DPI means more on-screen movement with less hand motion—like switching from walking to riding a scooter (same effort, more distance).
Next, in-game sensitivity is a software multiplier applied inside a specific game. Think of it as a volume knob layered on top of your DPI. Even with the same mouse, changing this setting dramatically alters how aiming feels.
Now here’s the number that actually matters: eDPI (effective DPI). The formula is straightforward:
DPI × In-Game Sensitivity = eDPI
Your eDPI is the true measure of sensitivity. It lets you compare setups across different players, games, or gear. Without it, you’re comparing apples to headshots.
For benchmarks: VALORANT and CS:GO pros often sit around 200–400 eDPI. Apex Legends commonly ranges 800–1,400 eDPI. Call of Duty players frequently land between 3,000–6,000 eDPI due to faster pacing.
Understanding this gives you consistency, cleaner muscle memory, and smarter adjustments—exactly what a solid fps sensitivity settings guide should deliver.
The Perfect Sensitivity Method: A Step-by-Step Process
Finding your ideal sensitivity isn’t guesswork—it’s a repeatable system. Follow this process and you’ll build settings that feel natural, consistent, and tournament-ready (yes, even if you’re grinding ranked at 2 a.m.). The biggest benefit? More control, fewer whiffs, and faster mechanical improvement.
Step 1: Establish a Baseline
Set your mouse to 800 or 1600 DPI (dots per inch, or how sensitive your mouse sensor is). Then adjust in-game sensitivity so your eDPI (DPI × in-game sens) lands between 200–400 for tactical shooters. This gives you a balanced starting zone used by many pros (Pro tip: lower is usually better for precision-heavy titles like VALORANT or CS2).
Why it matters: Starting in a proven range prevents extreme settings that sabotage muscle memory before it forms.
Step 2: The 360° Test
Do one full, comfortable swipe across your mousepad. If it equals a 360-degree turn, you’ve found your upper limit. If you spin twice, it’s too high. If you barely turn, it’s too low.
This defines your maximum usable sensitivity.
Benefit: You eliminate chaotic over-rotation while preserving fast turn potential.
Step 3: The Target Tracking Test
In the practice range, aim at a fixed point and strafe left and right. If your crosshair shakes, lower it. If it trails behind, raise it slightly.
You’ll gain smoother tracking—critical for winning mid-range duels.
Step 4: The Flick Test
Flick between two distant targets. Overshooting means too fast. Undershooting means too slow.
Dialing this in sharpens first-shot accuracy (and saves you from those “how did I miss that?” moments).
Step 5: Iteration and Confirmation
Make tiny adjustments. Then play several matches without touching settings. Muscle memory (your brain’s automation system for repeated movement) needs stability to develop.
The payoff? Consistency under pressure.
If you want deeper optimization beyond sensitivity, check out trigger stops paddle mapping and layout customization explained for hardware-level advantages.
Use this fps sensitivity settings guide once, follow it fully, and you’ll build mechanics that actually scale with your skill.
Advanced Tuning: ADS, Scoped Multipliers, and Consistency
Aim Down Sights (ADS) sensitivity is how fast your crosshair moves while aiming through a sight. It often differs from hip-fire sensitivity because zoom changes perceived speed. When your FOV (field of view) shrinks, the same hand movement feels faster. That’s why I almost always lower ADS slightly—it just feels more controllable.
The 1:1 ratio debate is heated. Matching ADS to hip-fire creates consistent muscle memory. Sounds perfect, right? In theory, yes. In practice, I think precision matters more than symmetry. A slightly lower ADS helps track heads instead of overflicking (and blaming the mouse).
Scoped multipliers adjust sensitivity for 2x, 4x, or sniper optics. Tweak each zoom so target movement feels consistent across magnifications.
For cross-game consistency, use a sensitivity converter to match your eDPI (effective DPI) everywhere. I recommend this in any fps sensitivity settings guide. Your muscle memory shouldn’t reset every new title.
Lock In Your Settings and Climb the Ranks
You now have the tools. The question is simple: keep tweaking, or commit and climb?
Option A: Constantly adjust settings after every bad match (blame the sens, tweak, repeat).
Option B: Lock your numbers and build reliable muscle memory.
The difference is consistency. By following the structured path—Baseline → 360 → Track → Flick—you removed guesswork. That’s why this method works.
Inconsistent aim feels random. Trained sensitivity feels repeatable.
Think of this as your final checkpoint in the fps sensitivity settings guide.
- Stop adjusting.
- Train daily.
Commit for one week. Let discipline—not doubt—win you more games.
To enhance your gaming experience and find the perfect sensitivity settings for FPS games, check out our complete guide, and if you’re looking to dive into the world of online gaming, be sure to read about how much Darkwarfall Games Online costs to get started – for more details, check out our How Much Is Darkwarfall Games Online.
Level Up Your Aim and Take Control
You came here looking for clarity on dialing in your aim, tightening your mechanics, and finally feeling in control of every flick and micro-adjustment. Now you understand how sensitivity impacts tracking, reaction time, muscle memory, and overall consistency in high-pressure matches.
The biggest frustration for most FPS players isn’t a lack of effort — it’s inconsistency. One match you’re locked in, the next your crosshair feels out of sync. That’s not a talent issue. It’s a settings issue.
By applying the principles in this fps sensitivity settings guide, you’re no longer guessing. You’re building a repeatable system that supports your playstyle, your hardware, and your competitive goals.
Now it’s time to act.
Test your settings in live scenarios. Fine-tune based on real engagement data. Commit to one optimized sensitivity instead of constantly switching.
Serious players don’t leave performance to chance. They optimize it.
If you want more competitive breakdowns, pro-level controller setups, and event-ready tactical insights trusted by competitive gamers, dive into our advanced guides now and start sharpening your edge today.
 There is a specific skill involved in explaining something clearly — one that is completely separate from actually knowing the subject. Geneyca Noble has both. They has spent years working with insider knowledge in a hands-on capacity, and an equal amount of time figuring out how to translate that experience into writing that people with different backgrounds can actually absorb and use.
Geneyca tends to approach complex subjects — Insider Knowledge, Gaming Concepts and Mechanics, Pro Controller Setup Guides being good examples — by starting with what the reader already knows, then building outward from there rather than dropping them in the deep end. It sounds like a small thing. In practice it makes a significant difference in whether someone finishes the article or abandons it halfway through. They is also good at knowing when to stop — a surprisingly underrated skill. Some writers bury useful information under so many caveats and qualifications that the point disappears. Geneyca knows where the point is and gets there without too many detours.
The practical effect of all this is that people who read Geneyca's work tend to come away actually capable of doing something with it. Not just vaguely informed — actually capable. For a writer working in insider knowledge, that is probably the best possible outcome, and it's the standard Geneyca holds they's own work to.
There is a specific skill involved in explaining something clearly — one that is completely separate from actually knowing the subject. Geneyca Noble has both. They has spent years working with insider knowledge in a hands-on capacity, and an equal amount of time figuring out how to translate that experience into writing that people with different backgrounds can actually absorb and use.
Geneyca tends to approach complex subjects — Insider Knowledge, Gaming Concepts and Mechanics, Pro Controller Setup Guides being good examples — by starting with what the reader already knows, then building outward from there rather than dropping them in the deep end. It sounds like a small thing. In practice it makes a significant difference in whether someone finishes the article or abandons it halfway through. They is also good at knowing when to stop — a surprisingly underrated skill. Some writers bury useful information under so many caveats and qualifications that the point disappears. Geneyca knows where the point is and gets there without too many detours.
The practical effect of all this is that people who read Geneyca's work tend to come away actually capable of doing something with it. Not just vaguely informed — actually capable. For a writer working in insider knowledge, that is probably the best possible outcome, and it's the standard Geneyca holds they's own work to.